While creating a Power Automate flow, I discovered an exciting new feature called the “Savings” (Preview) feature in Power Automate. When I tried it, I found it very helpful for those looking to reduce costs by automating tasks with Power Automate flows instead of performing them manually. This feature helps you record exactly how much time and money each of your flows saves your organization. Instead of relying on manual estimates or spreadsheets, you simply specify the minutes and cost value for each flow run, and Power Automate automatically aggregates those figures.
Whether you automate lead assignments, case escalations, billing notifications, etc., Savings turns every run into a quantifiable win. Let’s explore how to enable and use this powerful new feature.
Real-World Use Case: Automated Lead Routing in Dynamics 365 CE
Imagine your team manually assigns incoming leads by region—about 5 minutes per lead at $1 per assignment. By enabling Savings on your existing lead-routing flow, you can:
Record 5 minutes saved per run
Record $1 saved per run
Over 1000 runs/month, that’s 5000 minutes (83+ hours) and $1000 saved—automatically tallied in your flow’s details.
Steps to Configure “Savings (Preview)”
1. Open Your Flow’s Details Pane
In Power Automate, go to My flows, select your flow, and click Details.
2. Locate “Savings (Preview)”
Navigate downward to locate the ‘Savings (Preview)’
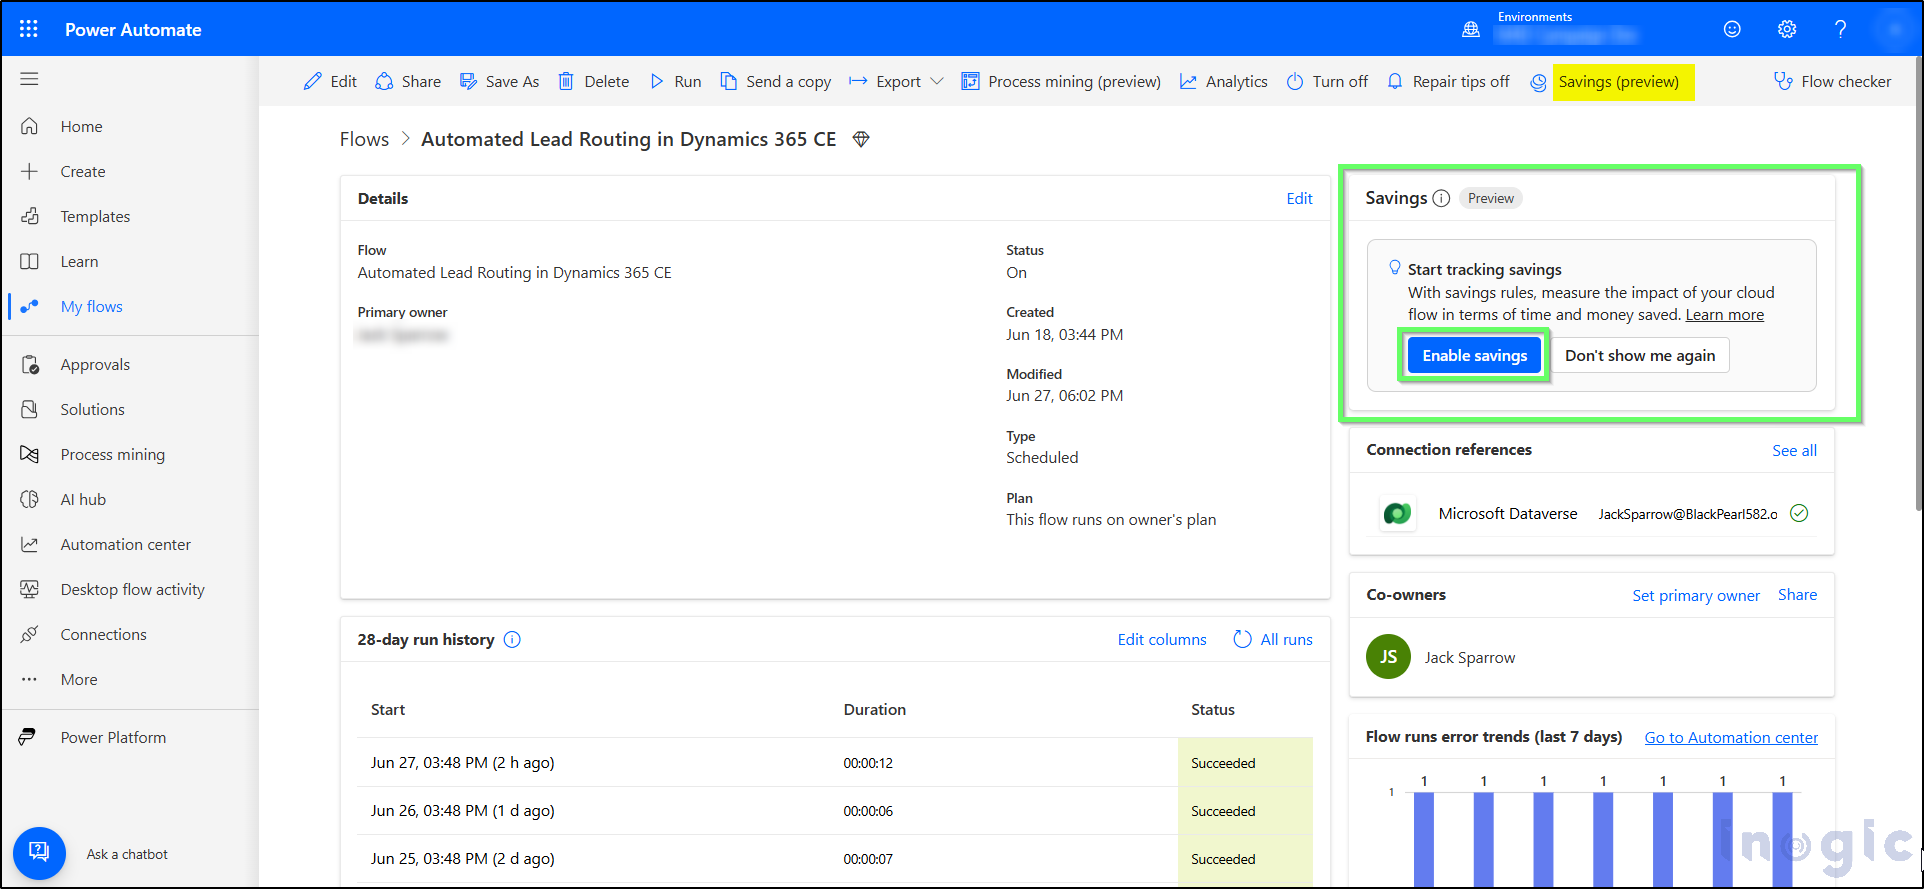
3. Add a Savings Rule
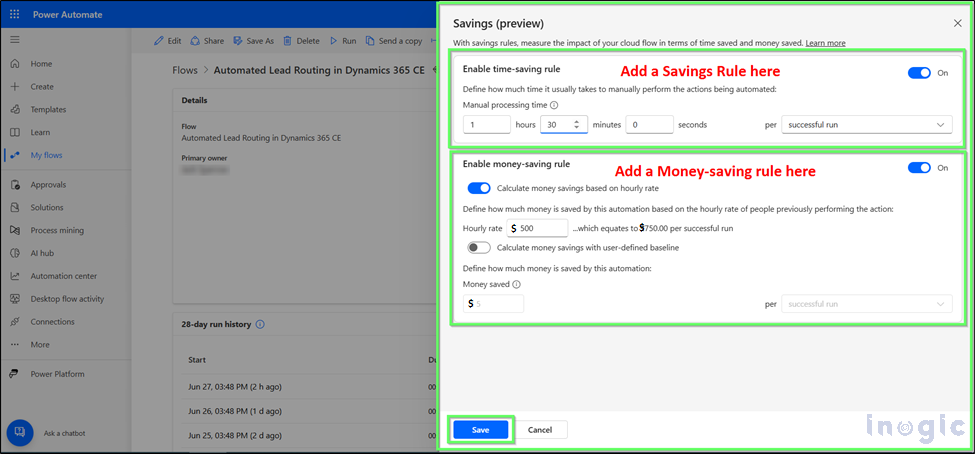
4. Define Time Savings
Enter the minutes or hours your flow saves per run (e.g., “5 minutes”).
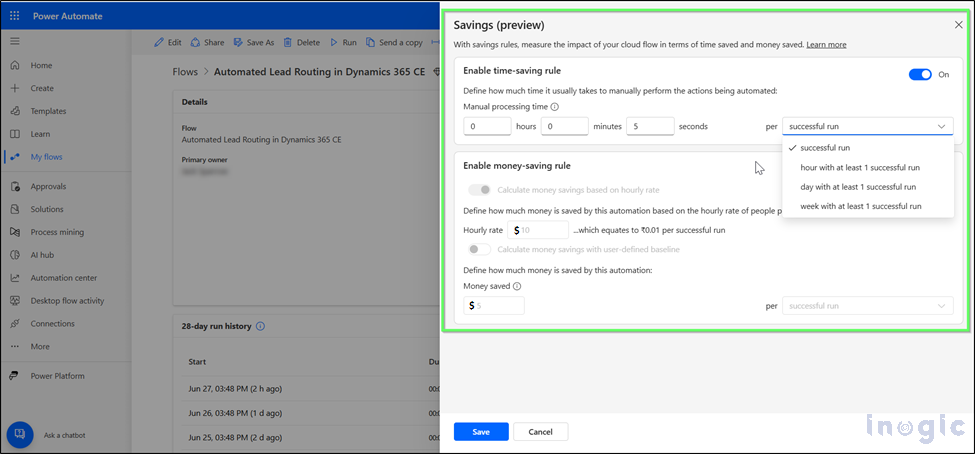
5. Define Cost Savings
Choose one:
Hourly rate (e.g., “$50/hr”)
Fixed cost per run (e.g., “$10”)
6. Save Your Rule
Click Save.
You’ll see a toast: “Savings rule added.”
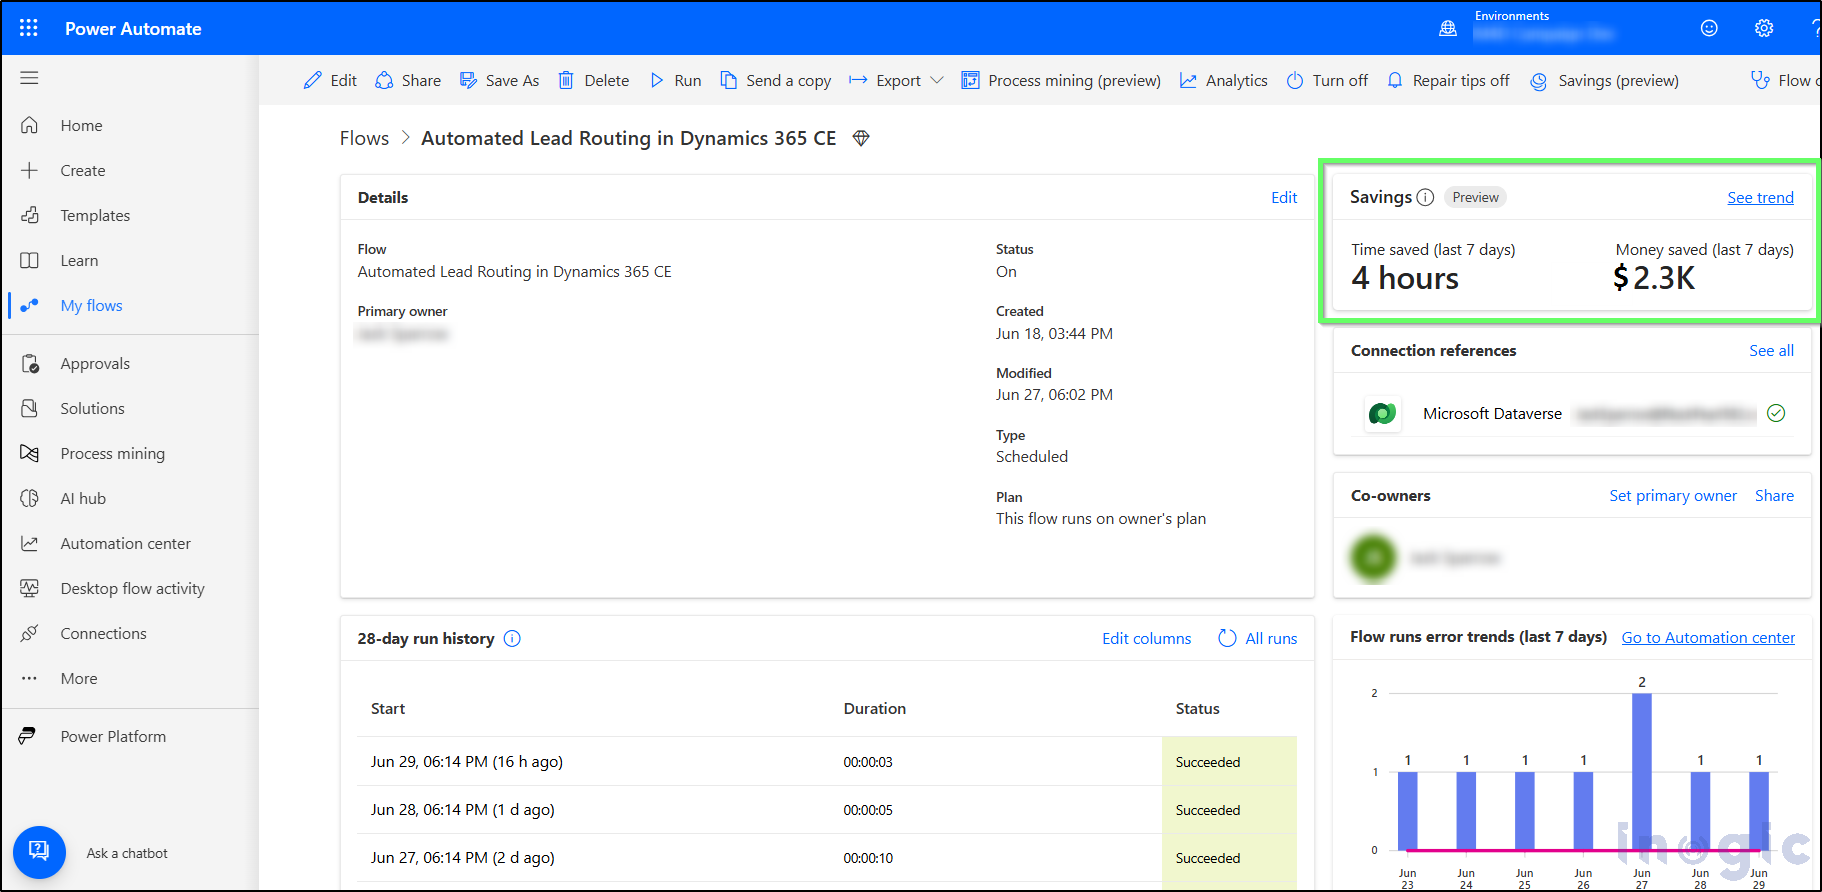
7. Verify and Monitor
After the next successful run, revisit Details to see updated totals.
Click See trend for graphical insights by day, week, or month.
No flow redesign is required, just enable Savings on your existing automations and watch the metrics roll in.
Admin Configuration: Enable & Manage Savings (Preview)
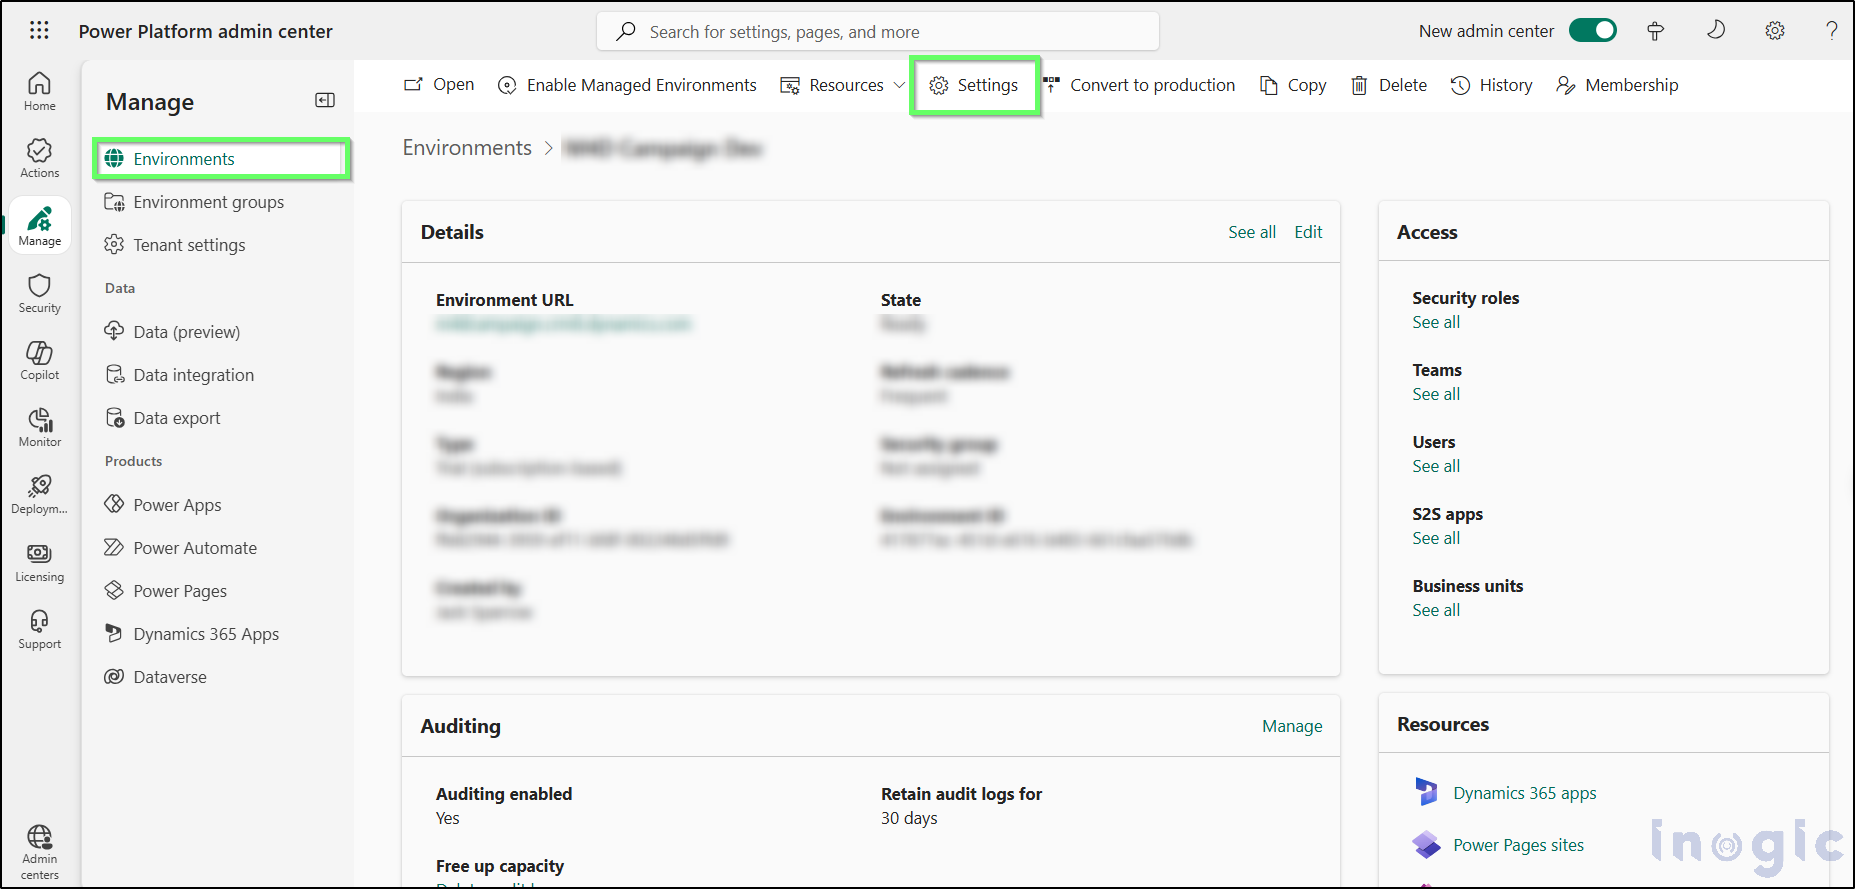
As an admin, you’re in control. Head to the Power Platform admin center to turn on the preview and tweak retention settings.
1. Sign in to the Power Platform admin centerVisit powerplatform.microsoft.com with tenant-admin credentials.
2. Select Your Environment
Click Environments in the left nav.
Choose the target environment.
3. Open Environment Settings
On the command bar, select Settings.
Under Product, choose Features.
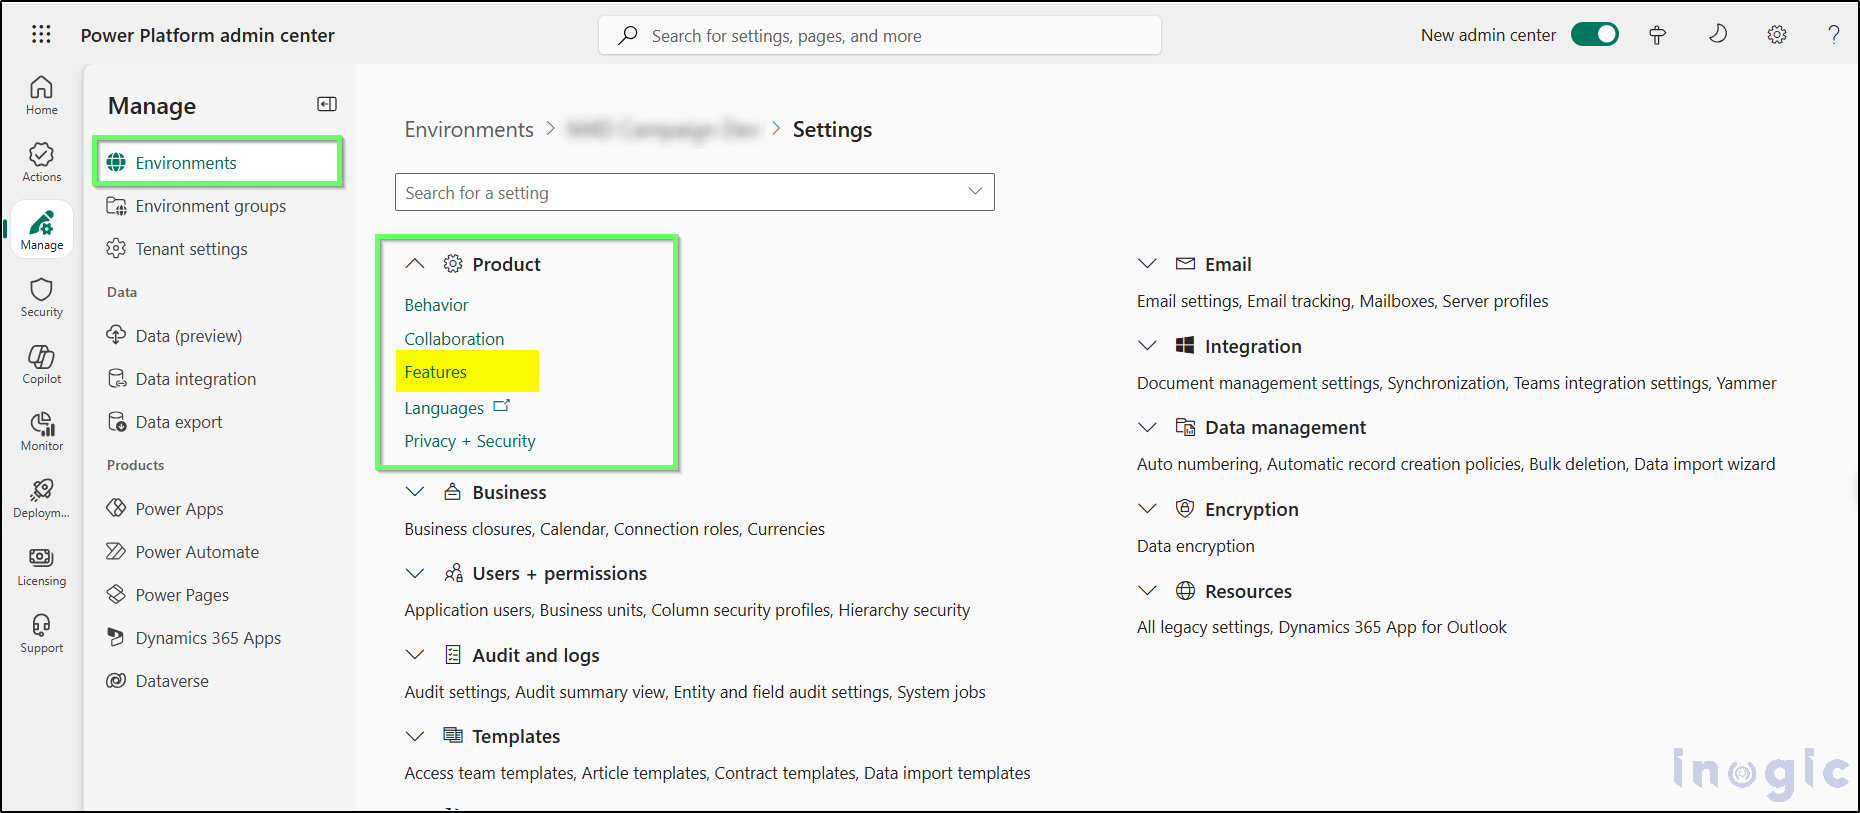
4. Locate “Savings (preview)”
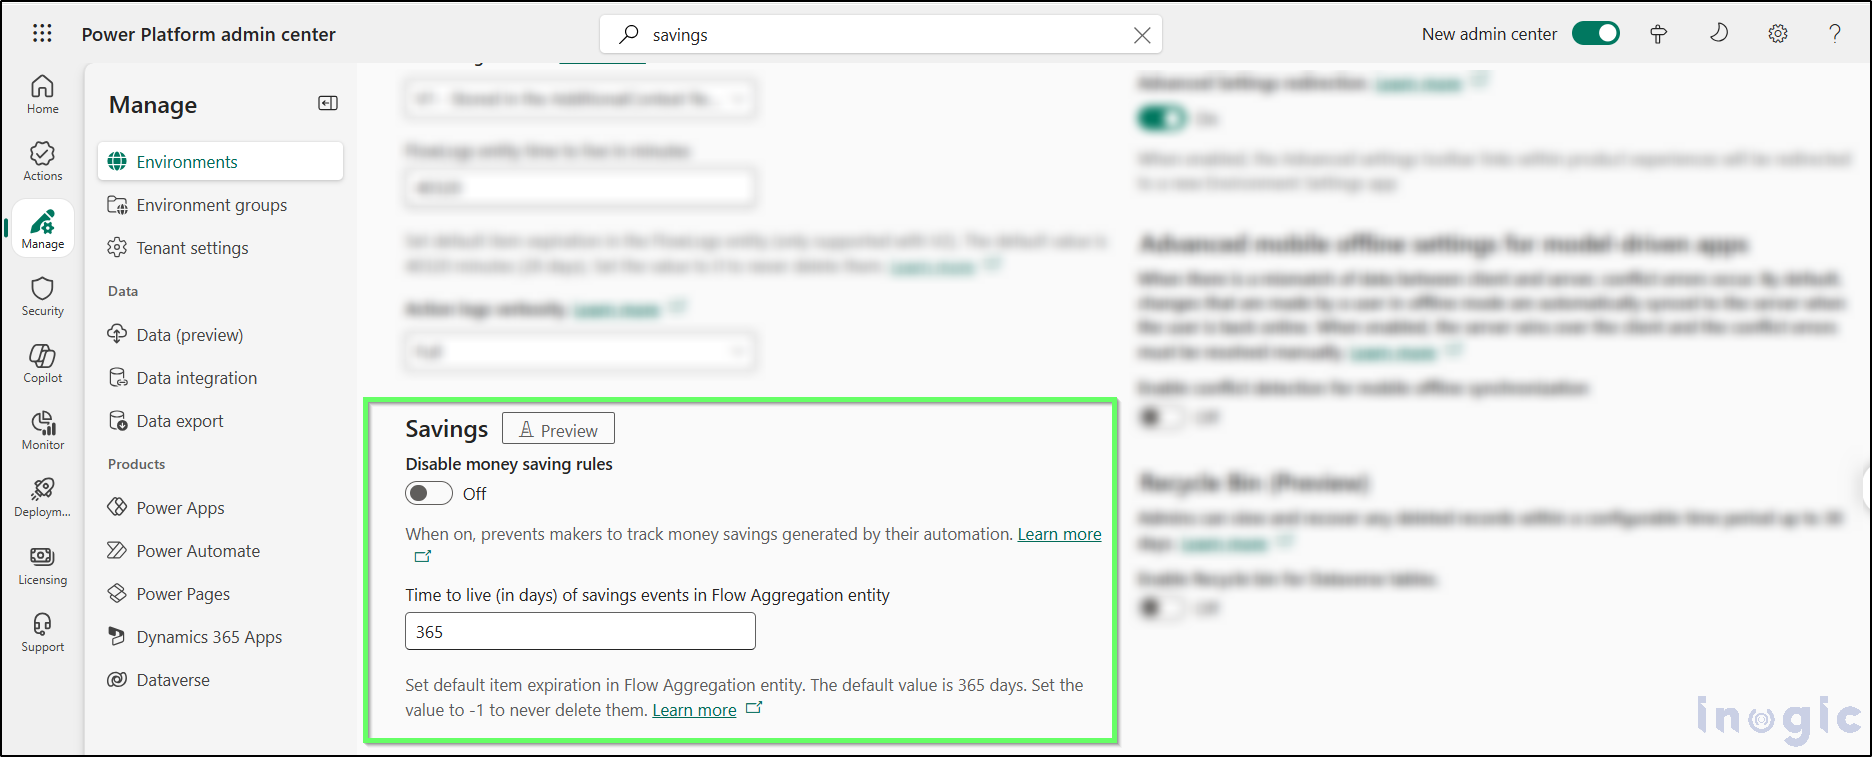
Scroll to the Savings (preview)
5. Toggle “Disable money saving rules”
Off (default): Makers can create time- and money-saving rules.
On: Prevents new money-saving rules (existing data remains).
6. Configure the ‘Time to live (in days)’ value for savings events.
Enter the retention period for the Flow Aggregation table (default: 365).
Use -1 to retain indefinitely.
7. Save Environment Settings
Click Save.
You’ll see “Environment settings updated.”
Where CRM Stores Your Savings Configuration and Data
All Savings metadata lives in Dataverse:
Saving rules are stored in the Saving Rule
Generated savings events are recorded in the Flow Aggregation
Make sure users have at least the Environment Maker role (or equivalent) to view and edit records in these tables. (learn.microsoft.com)
Where to See Your Savings Data
Flow Details page: Glance at the cumulative savings card.
Automation Center: Click See trend for rich charts.
Power Platform Admin Center & Power BI: Export or embed data for enterprise reporting.
Notes
Only successful runs generate savings (test runs don’t).
Rounding: Hourly-rate savings are rounded to the nearest whole unit.
Preview-only: Available in supported regions on preview environments.
Child flows: Parent-flow rules capture all runs, including those triggered by child flows.
Conclusion:
With Savings (preview), you’re not just automating, you’re quantifying success. By capturing and showcasing the real-world time and cost value your flows deliver every day. Start defining your rules today and turn every flow run into a measurable impact!